Basic Pay Button Integration
Overview
The Pay Button allows a Merchant to create a simple HTML link that can be integrated into a webpage or e-mail. When clicked, the user is taken to the hosted payment form with pre-populated product information such as the amount, product description and order reference.
We offer the Pay Button as a QR Code, as a styled and un-styled button and a simple link.
The advantage of using the Pay Button compared to our hosted integration is its simplicity. It has the features of the hosted form without needing server-side scripting knowledge. Just place the link under your products and you’re done. All the cardholder must do is click a button, enter their payment details and they have paid!
Creating a Pay Button using the Virtual terminal
The easiest way to generate a pay button is to do it in the Handpoint backend. We’ve integrated the Pay Button into the virtual terminal so it’s all in one place. If you want more out of your Pay Button, we offer that too with our advanced integration. This requires more server-side scripting knowledge, but allows more control over what information your pay button contains.
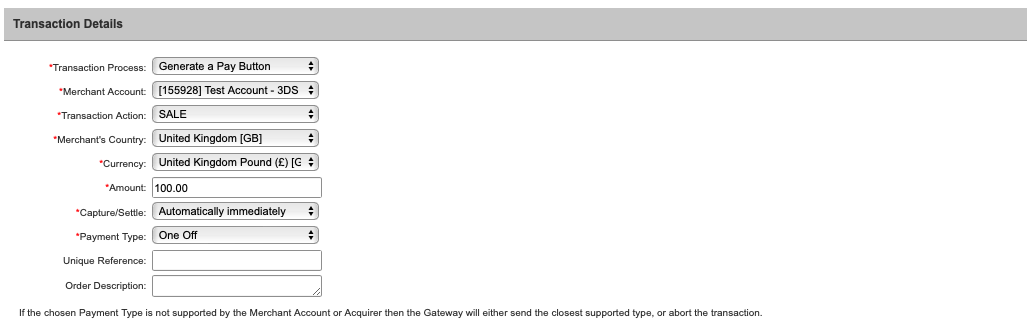
Transaction Details
Under ‘Transaction Details’, change the Transaction Process field to Generate a Pay Button.
| Field | Mandatory | Description |
|---|---|---|
| Transaction Process | Yes | Select Generate a Pay Button option if you wish to generate a Pay Button. |
| Merchant Account | Yes | Select the Merchant Account/ID you wish to process the transaction with |
| Transaction Action | Yes | Use the drop down menu to specify the type of transaction. SALE, PREAUTH, VERIFY. |
| Merchant's Country | Yes | Use the drop down menu to specify the country in which the Merchant is based. |
| Currency | Yes | Use the drop down menu to specify the currency to be used for the transaction. |
| Amount | Yes | Enter the amount of the transaction you wish to process. |
| Capture/Settle | Yes | Use the drop down menu to specify when the transaction is going to be settled. |
| Payment Type | Yes | Select if this is a one off payment or whether this is part of a recurring/instalment agreement. |
| Unique Reference | No | You can enter a unique reference to help identify the sale in your systems. |
| Order Description | No | Description of the order. |
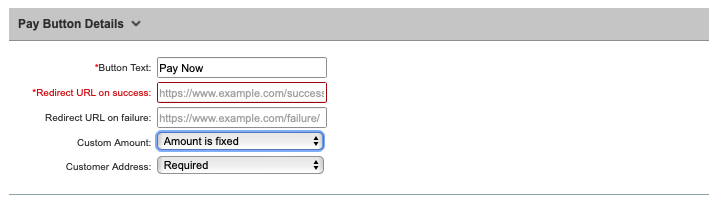
Pay Button Details
With the Pay Button mode selected, a new section called ‘Pay Button Details' appears in the Virtual Terminal.
| Field | Mandatory | Description |
|---|---|---|
| Button Text | Yes | The text to display on the Pay Button itself, e.g. “Click Here To Pay”. |
| Redirect URL on success | Yes | The location to go to after the payment has taken place. This can be any URL you wish to direct the customer to after a payment has been made. NOTE: If a value for Redirect URL on Failure is supplied, the URL specified for Redirect URL will only be used when a payment has been successful. |
| Redirect URL on failure | No | The location to send the customer to after a payment has failed. If no value is provided, the value in Redirect URL will be used. |
| Custom Amount | No | Use the drop down menu to specify whether the amount is fixed or whether the consumer can decide what to pay, i.e. donation |
| Customer Address | No | should the cardhoder enter his/her address when filling out the payment form. |
Inserting the Link/QR Code
Once the 'Create Button' has been clicked, the link will be formatted and displayed on the next page.
There are 4 possible options to embed the link:
- Styled
- Un-Styled
- Link only
- QR Code
Previews of all the styling options can be seen in the Preview window.
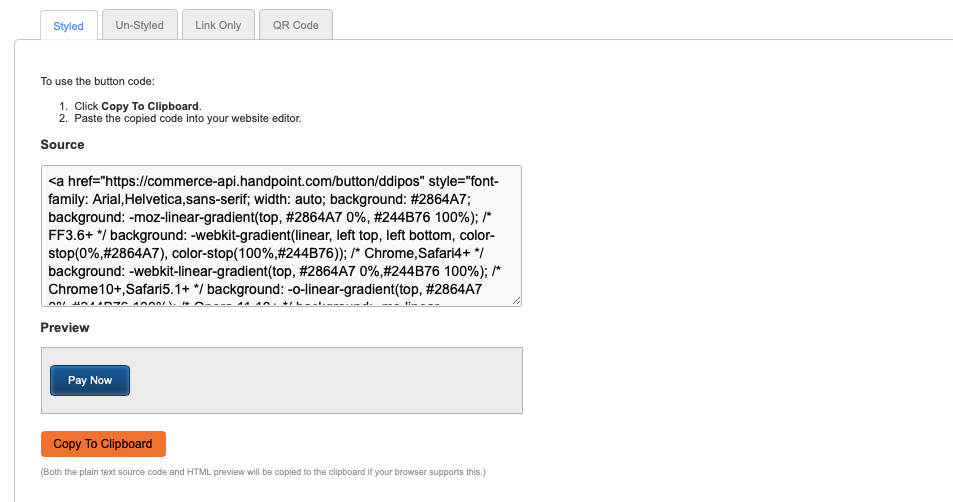
Styled
The styled option makes the link look like a pre-formatted button. This is useful for displaying on websites to fit the style/content of a web-page. It isn't always suitable to send across e-mail clients as the client may not support formatted CSS.
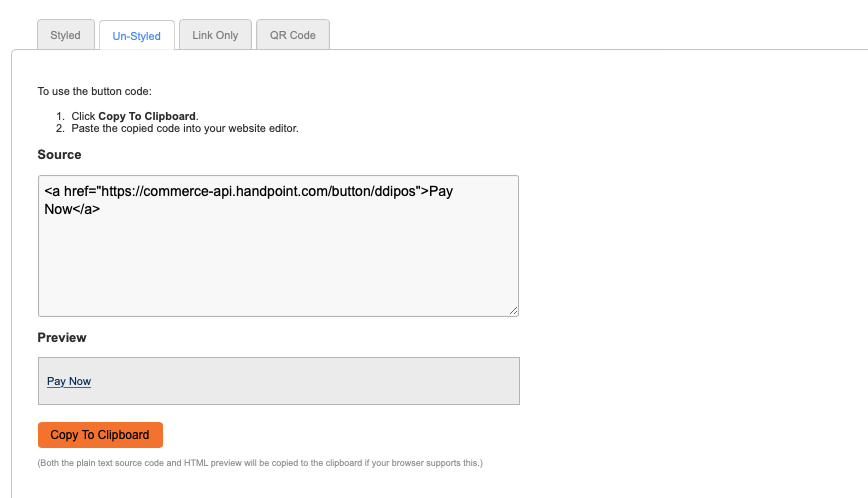
Un-Styled
The Un-Styled option creates a standard link that can be styled later using CSS or used as is. This is useful if you want a base to work from to create a button of your choice using CSS.
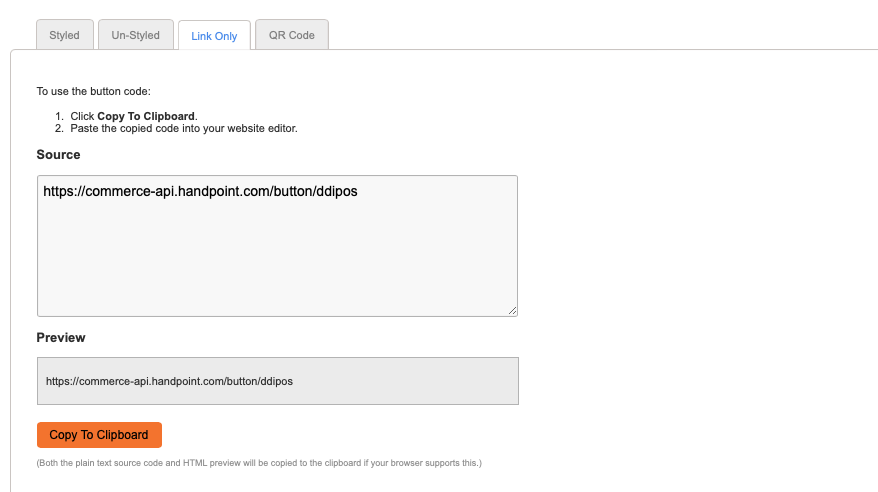
Link Only
The link only option provides the raw URL without embedding it in an HTML link. If you want a simple link to send to customers, this is the best option.
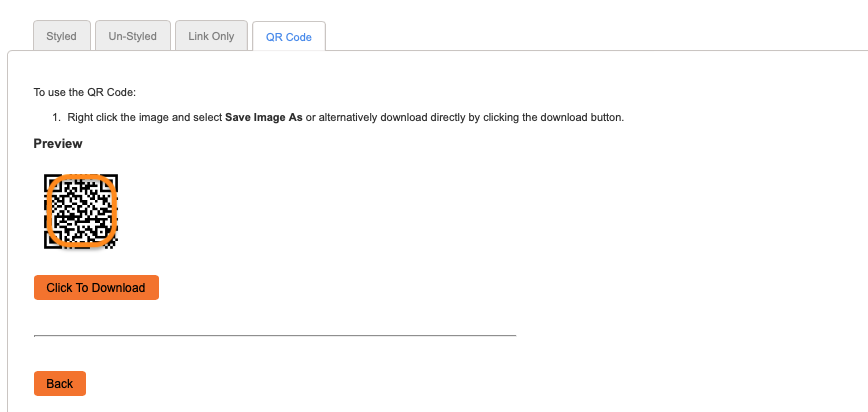
QR Code
The QR Code option adds the ability for a QR Code to be downloaded. It is automatically generated and is displayed on the page for testing/preview purposes. Click the download button to save it in a file which can then be uploaded or placed wherever you wish. Alternatively, you can right click the preview image and save it from your browser.
A QR Code scanner must be used to 'read' the code, which will then send the link of the payment form to the device.